 |
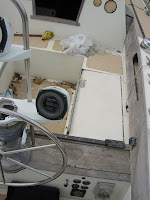
| A "Before" Shot of the Islander Deck |
Modern boat paint is impressive! This deck had been painted years earlier and it was still in remarkable shape. Even so, there were signs of wear and a few spider cracks. So we decided to strip the deck of all hardware and teak and apply new paint.
 |
| The Newly Painted Cabin Top |
 |
| The Primed Cockpit Area |
A single layer of primer was followed by three coats of Interlux Brightside (thined slightly with 333 brushing thinner) single part polyurethane. The smooth portions of the deck were sanded with 220 paper between coats. I like the 3M sponge sanding blocks for this work. Used with water, they last and last. The non-skid was not painted at this point nor was it masked so the white paint for the smooth cabin top encroached to some partial exent on the non-skid.
When dry, the non-skid areas were carefully masked. A 1/8 inch wide vinyl masking tape from 3M was used to define the non-skid since it could be smoothly bent round the small radius corners. When this tape was complete, a second 2 inch wide blue 3M masking tape was used to extend the narrow coverage provided by the thin tape. Seattle Grey Brightside in two coats completes the deck repaint. Because of the non-skid pattern it was not possible to sand between coats. Just to be safe we applied the second coat within 24 hours of the first.
Keep the posts coming, this is very interesting.
ReplyDeleteRod 'Leading Edge'
Just installed a "Nature's Head". It was a tight fit but looks good and works great. We will have a video on the whole installation process soon (Eric, my son, is editing it now).
Delete